Tag Archives: Brazilian

DIY Cheeky Bikini Bottoms

28 May

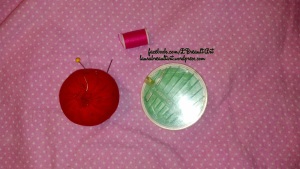
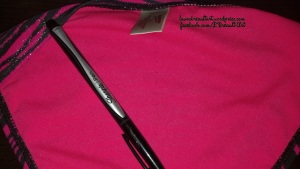
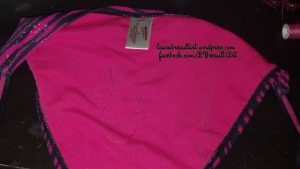
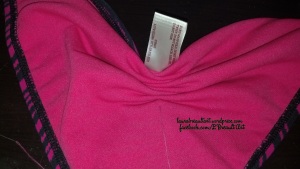
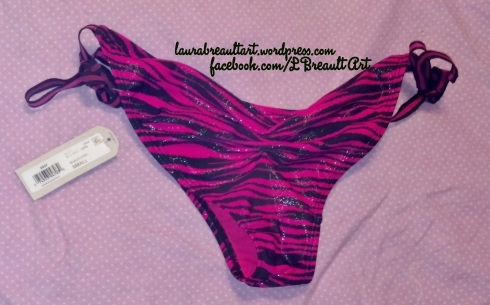
IMG_20130527_225856_068 Okay my Florida people; it’s that time of the year! The sun is out, the weather is warming up, the beaches are getting packed, and social networks are being blown up with pictures of people under the sun in their bikinis! Although I love the cold weather because my hair stays perfect and my makeup actually stays on my face, however I also love lying under the sun, getting tan and cooling off in the salty ocean waves. While browsing Pinterest, as I so often do, I came across another DIY project that I just HAD to do. I know I’m not the only girl who hates those big, baggy, saggy granny panty bikini bottoms that create the ugliest tan lines of mankind, and if you try to buy “cheeky” bikini bottoms, or thongs even if you’re shameless, they’re pretty pricy ($30+). Not to mention the fact that I’m Brazilian and in Rio de Janeiro EVERYBODY walks around in thongs, speedos, even naked! I would never do any of that here in America, so I’ll do the next best thing: cheeky bikini bottoms! So here’s a simple solution: DIY Bikini Ruching. If I would’ve done it right the first time, the whole process would have only taken 15 minutes. But, that wasn’t the case for me. IMG_20130527_212224_529 IMG_20130527_213114_844 IMG_20130527_220454_755 IMG_20130527_223201_300 IMG_20130527_223311_346To start you will need a pair of bikini bottoms of your preference, a needle, thread the same color as the bottoms, a pen and scissors. The first time I attempted this, I only used one thread and it broke instantly. The second time, I used 2 threads and it lasted up until I tried them on and adjusted them, and then SNAP! That broke too…..so the third times a charm! I tediously fit THREE pieces of thread through that itty bitty needle hole (successfully) and start my sewing. Before I add any extra details, let me tell you the step by step process:
Just underneath the tag, make a tiny dot with your pen about ¼ of an inch away from the top seam. Continue drawing little dots straight down the middle a ¼ inch spaced between each dot. This is so you know where to put your needle. You can make the dots thinner or wider apart if you’d like depending on what you want it to look like. (The longer the distance, the bigger the ruch.)

Put your 3 threads (or 1 thick piece of thread if you have any [about 10” in length]) through the needle and tie a knot at the bottom.

Starting from the INSIDE of the bottoms, poke the needle through the top seam so the needle comes out on the outside. Then poke it back through down to the next dot. Do this consecutively until it’s at your desired ruch size. You can test this by pulling the threads to see how much up they will go, then pull the bottoms back to continue if needed. If it’s too much ruched, take out a dot or two. If it’s not enough, continue the process by poking through more dots.

When finished, cut the thread AT THE VERY END BY THE NEEDLE so you have plenty of string to use to tie the end knot. After you cut the thread by the needle grab three threads in each hand and tie 3 good, tight knots to secure the ruch. Cut the excess thread and viola, you have brand new cheeky bikini bottoms! FOR FREE (:

IMG_20130527_225734_466

Brazilian Dessert <3

25 Feb

2013-02-25_20-50-20_478

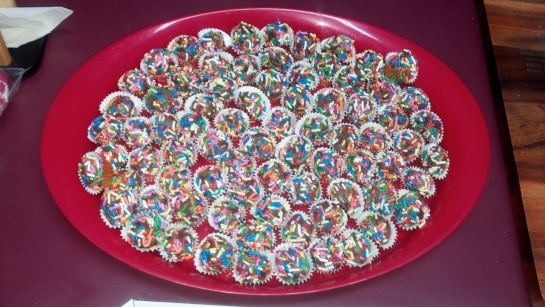
This is my mom’s famous Brazilian Brigadeiro’s Recipe. It has been a traditional dessert custom from my mom’s side of the family in Rio de Janeiro, Brazil. They are TOO DIE FOR. It only takes 4 simple ingredients and about an hour and a half to make. They are fattening but worth every calorie, I promise. (;

2013-02-25_18-27-05_899 2013-02-25_18-33-21_315 2013-02-25_18-47-23_630 2013-02-25_20-34-43_715Ingredients:

  • 2 cans sweetened condensed milk
  • 1 stick butter (1/2 stick per can)
  • 4 tbsp cocoa powder (or chocolate syrup)
  • Lots of sprinkles!
  • Candy/small cupcake wrappers

NOTE: This makes approximately 100 candies depending on the size you make them.

Directions:

  1. In a medium saucepan, combine butter, condensed milk and cocoa poweder or syrup. Cook over medium heat for about 20-25 minutes, turning the heat down to medium-low heat after about ten minutes or whenever the sauce starts to bubble vigorously.
  2. Stir consistently, the entire time, no breaks! To make sure you evenly cook the sauce mixture until it becomes a very thick paste. I suggest using a ceramic pot because then the mixture wont stick. But if you don’t have a ceramic pot, a regular one works just fine.
  3. After the sauce becomes a thick paste, remove from heat and let cool down for about 30-45 minutes. DO NOT cool in refrigerator. Let it cool down naturally.
  4. Now this step will take two people, one to make the balls and one to add the sprinkles. But this is totally capable of being a one man job. Just follow directions carefully! Separate all the candy wrappers and have them ready to insert the candies once they are sprinkled. You can set them on a large platter or plate, whatever you have that works.
  5. In a very large shallow bowl, pour all the sprinkles in it. Cover your hands with softened butter so you will be able to roll the mixture into balls. You can use and kind of greaser but butter works the best because its what you used to cook the candies with, so it wont change the flavor.
  6. After you butter your hands, use a small spoon to get a good amount of the dulce de leche mixture (that will fit in the candy wrapper) and roll it into a ball, then place it in the bowl of sprinkles. If you are doing this by yourself, do not start messing with the sprinkles until you have placed all of the candies in there, otherwise you will just make a big huge mess!
  7. Once you’ve finished rolling all the candies, cover them entirely with the sprinkles and place them in their designated wrapper. Then you’re done! I suggest putting them in the refrigerator for about 20-30 minutes to make them a little hard because they taste better in my opinion. Or if you just can’t wait then go ahead and eat them because they taste good regardless! (:

Meat, Cheese & Spinach Stuffed Pasta Shells

16 Feb

2013-02-14_20-13-52_613

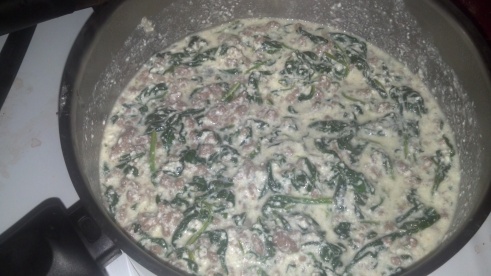
These Delicious Homemade Meat, Cheese & Spinach Stuffed Shells was what I had for dinner a couple nights ago, and let me just inform you that they were so good, I literally could have had an orgasm in my mouth. A little too dramatic, lol but seriously, they were THAT good. I got the recipe from a fellow blogger although their recipe used very little amounts of ingredients. I used about twice as much as their recipe had and I added ground beef for the extra protein. My mom mentioned that I might be an even better cook than she is! That’s one of the greatest compliments ever because my mom is the best cook ever in my opinion. Ever since I was a little girl she always made homemade dinners from scratch Brazilian style that always tasted like heaven. So for her to tell me I could be a better cook than her is unbelievable. I posted the picture of my finished meal on Facebook and it got pinned on Pinterest! That just tells me how amazing my food looks (thanks to Instagram). I will leave reference to the bloggers page so you can see their recipe if you decide to make this yourself! (:

Related Articles: http://lisaglauner.wordpress.com/2013/01/09/recipe-marks-spinach-cheese-stuffed-shells/

2013-02-14_19-05-06_623

2013-02-14_19-19-14_233

2013-02-14_19-28-40_859

2013-02-14_19-39-34_293

2013-02-14_19-40-05_235

2013-02-14_19-39-46_85

Hand-Made Birthday Card for Momma

12 Feb

IMG_20130212_001545

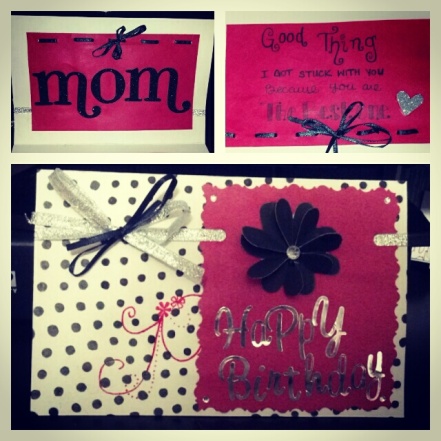
This is the Birthday Card that I made for my Mom’s birthday this year. I spent a couple hours on it, but half of that was just drying time. I got some ideas off of Pinterest and put them together to create this beautiful card! I put this (with some money inside) on her desk for her so that when she woke up, that would be the first thing she saw. The funny thing is, she didn’t even see it. I had to show it to her, lol! I did that because she usually goes to her desk first thing in the morning after she makes her coffee to check her email, but apparently that wasn’t the case this morning. Regardless, she absolutely LOVED her present and was very surprised when she saw that money in there! ;D

2013-02-12_20-07-10_140
I also bought her a red velvet cake that said Happy Birthday Mom. Everything HAD to be red because that’s her favorite color. She told me that she was so happy that she had me in her life and that she was very thankful of all her gifts and told me she loved me very much. I even got all dresses up, curled my hair for an hour and a half and everything just to celebrate her birthday. She appreciated everything I did for her. Tonight we’re going to spend time together making brigadeiro’s, these delicious Brazilian candies made of dulce de leche and sprinkles. They are both of our favorite desserts ever! But I will post about those another time so I can put pictures up and post the recipe. (:

IMG_20130127_131047

A Most Recent Picture of My Mother & I.
From My Baby Shower ❤

The F. Nails

Nails for the stylish youth

arosebrown

Fashion. Beauty. Photography. Art. Advertising. Design.

Nail Luxxe

Nails, Nail Art Designs, Nail Care & More

Beauty by Brittany

Everything and Anything Beauty!

dottyaboutnails

One girl, ten nails and a million nail polishes....

Polish Alcoholic

I confess... I'm addicted to nailpolish

Doula Momma

Discussing pregnancy, birth, cesarean, VBAC, breastfeeding, babies and more

CosmeticsObsession

Your one stop blog for everything makeup.