Tag Archives: simple

DIY Glitter Magnets

24 Jun

Pinterest has got to be the most addicting website on the internet! What could be better than a social network site that is nothing but a bunch countless pictures from different people all over the world with some of the most amazing ideas?! I pin all kinds of pics on a regular basis that give me such inspiration to just do things. I think I pinned more than I could do in a lifetime, lol! Well anyways, I came across this really cute project that takes very little time. It’s very girly, prissy and stylish, definitely for the ladies that love sparkles like me. Here’s what you’ll need:

  • IMG_20130524_174317_927 IMG_20130524_174613_203 IMG_20130524_184753_320Mod Podge (Walmart Prices may vary [$3-7]
  • Foam Brush ($2 for 3-pack @ Walmart)
  • Stick-On Magnets ($3 and some change @ Walmart)
  • Fine Glitter ($1 per tube [variety of colors] at Sally’s Beauty Supply or buy a pack of 5 tubes for $5 @ Walmart)
  • Bag of Clear Stones ($1 @ Dollar Tree)

Directions:

Take a foam brush and paint a thin layer of mod podge over the flat back of the stone.

Pour glitter over wet glue to cover entirely.

Flick the other side of the stone upside down to get the excess glitter off before painting another thin layer of mod podge over the glitter.

After it’s completely dried, add a magnet to the back.

You’re done! See how simple that was? It’s so adorable too, giving your magnetic board a little extra dazzle to it. ;D

Also, you can use different things to decorate your magnets besides glitter. Pictures, scrapbook paper, newsprint, and other neat things can also be cut to size and glued to your stone to make your own personalized magnets. I might make some letter magnets for Natalia to use when she’s old enough as one of my homeschooling ideas!

IMG_20130524_211341_009

DIY Cheeky Bikini Bottoms

28 May

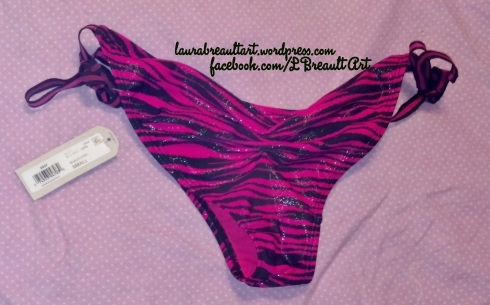
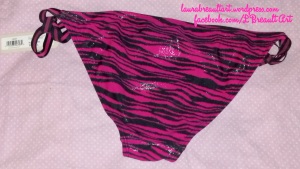
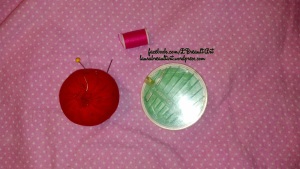
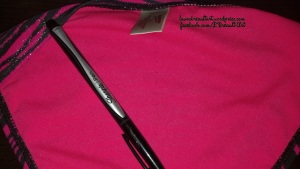
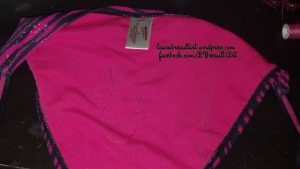
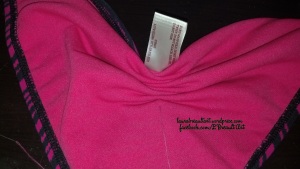
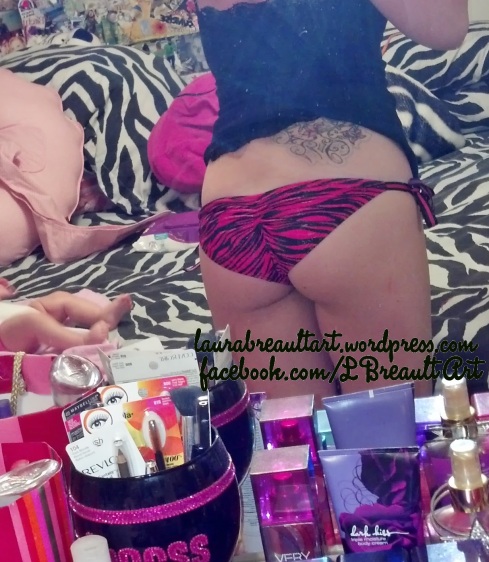
IMG_20130527_225856_068 Okay my Florida people; it’s that time of the year! The sun is out, the weather is warming up, the beaches are getting packed, and social networks are being blown up with pictures of people under the sun in their bikinis! Although I love the cold weather because my hair stays perfect and my makeup actually stays on my face, however I also love lying under the sun, getting tan and cooling off in the salty ocean waves. While browsing Pinterest, as I so often do, I came across another DIY project that I just HAD to do. I know I’m not the only girl who hates those big, baggy, saggy granny panty bikini bottoms that create the ugliest tan lines of mankind, and if you try to buy “cheeky” bikini bottoms, or thongs even if you’re shameless, they’re pretty pricy ($30+). Not to mention the fact that I’m Brazilian and in Rio de Janeiro EVERYBODY walks around in thongs, speedos, even naked! I would never do any of that here in America, so I’ll do the next best thing: cheeky bikini bottoms! So here’s a simple solution: DIY Bikini Ruching. If I would’ve done it right the first time, the whole process would have only taken 15 minutes. But, that wasn’t the case for me. IMG_20130527_212224_529 IMG_20130527_213114_844 IMG_20130527_220454_755 IMG_20130527_223201_300 IMG_20130527_223311_346To start you will need a pair of bikini bottoms of your preference, a needle, thread the same color as the bottoms, a pen and scissors. The first time I attempted this, I only used one thread and it broke instantly. The second time, I used 2 threads and it lasted up until I tried them on and adjusted them, and then SNAP! That broke too…..so the third times a charm! I tediously fit THREE pieces of thread through that itty bitty needle hole (successfully) and start my sewing. Before I add any extra details, let me tell you the step by step process:

Just underneath the tag, make a tiny dot with your pen about ¼ of an inch away from the top seam. Continue drawing little dots straight down the middle a ¼ inch spaced between each dot. This is so you know where to put your needle. You can make the dots thinner or wider apart if you’d like depending on what you want it to look like. (The longer the distance, the bigger the ruch.)

Put your 3 threads (or 1 thick piece of thread if you have any [about 10” in length]) through the needle and tie a knot at the bottom.

Starting from the INSIDE of the bottoms, poke the needle through the top seam so the needle comes out on the outside. Then poke it back through down to the next dot. Do this consecutively until it’s at your desired ruch size. You can test this by pulling the threads to see how much up they will go, then pull the bottoms back to continue if needed. If it’s too much ruched, take out a dot or two. If it’s not enough, continue the process by poking through more dots.

When finished, cut the thread AT THE VERY END BY THE NEEDLE so you have plenty of string to use to tie the end knot. After you cut the thread by the needle grab three threads in each hand and tie 3 good, tight knots to secure the ruch. Cut the excess thread and viola, you have brand new cheeky bikini bottoms! FOR FREE (:

IMG_20130527_225734_466

Homemade Frappuccino & Pigs In A Blanket

30 Apr

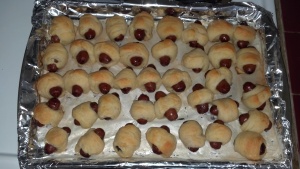
Looking for a quick snack that’s both delicious and quick to make? Here’s the perfect recipe for you! These pigs in a blanket are AMAZING and they go well with my homemade caramel frapp that I chose to accompany this delicious snack.

2013-04-15_19-00-43_904Pigs In A Blanket Recipe
Ingredients:

  • 1 Package of Little Smokies (You can also use cut up hotdogs to improvise!)
  • 1 Can of Crescent Rolls
  • Parmesan Cheese (Optional)
  • 1 tbsp. Butter
  • 1 tbsp. Flour
  • Large Baking Pan

Directions:

  1. Preheat oven to 350F.
  2. Boil Little Smokies & drain to cool.
  3. Grease Baking Pan with butter and Flour, Any flour left over put back in container or empty in the sink.
  4. Cut the crescent roll dough into little strips, as many as the number of little smokies you have.
  5. Wrap the smokies with the strips of dough and line them on your baking pan. You can sprinkle Parmesan cheese on top for extra flavor if you like.
  6. Bake for 12-15 minutes or until golden brown. Serve Warm

IMG_20130415_191004Caramel Frappe Recipe
Ingredients:

  • 6 oz Cold Coffee
  • 1 cup Milk
  • 2-3 tbsp Caramel
  • 2-3 tbsp Sugar
  • 1 cup Ice
  • Whip Cream to Top (Optional)

Directions:

  1. Blend all Ingredients except the whip cream in a blender until its to your desired consistency.
  2. Pour in a glass and your ready to go! Add whip cream and drizzled caramel on top if desired. (:

Simple huh?! Easy to make and very, VERY tasty. Enjoy! ❤

Bold Nails!

28 Apr

Here is my latest nail art design. I’m very into the bright neon colors lately due to my love for bright colors and the fact that summer is right around the corner. I’m ready to make a bold statement with these nails. (:

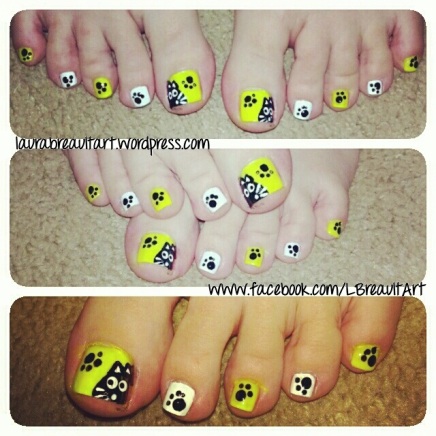
IMG_20130414_191859We’ll start with my kitty cat toes. I used a florescent yellow and white as my base colors. Then used my dotting tool and a toothpick to draw the kitty cats and paw prints. Aren’t they just adorable?!

IMG_20130414_214448As for my nails, I felt that a bright turquoise was an appropriate color to match these toes. I also bought a teal dress last week that I plan to wear this weekend, so these nails will match it perfectly. I kept it plain and simple this time because I have an infant to take care of, which means I’m on call 24/7, which means I couldn’t spend hours doing anything fancy as I have done when I was pregnant. This took me about half an hour to do not including drying time. I use cooking spray to help dry the nails out, and I must say it works like a charm. I painted the accent nail white and did a half zebra half leopard print design on them. They have gotten a lot of compliments. ❤

Girly Toes: Rhinestones, Bows & Pearls!

16 Mar

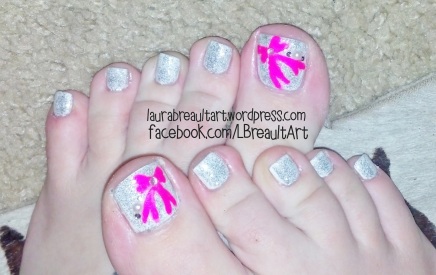
2013-03-06_22-02-49_441Here are my pretty bow toes! They are so girly and I love it! (:

I painted all my toes with two coats of Ruby Kisses French White. Then with one coat of silver sparkle polish by Pure Ice. I then used my large dotting tool to make sideways hearts to form the bow ties with pink polish, and then used my smallest dotting tool to drag out the ribbons. Next time I will use a toothpick so they’re not so rounded! Finally I added a large rhinestone in the center of my bows, a large pearl on one side of the ties, and two smaller rhinestones on each side of the pearl, finishing them off with a clear coat.

DIY Scarf Organizer

5 Mar
2013-03-03_15-50-16_967

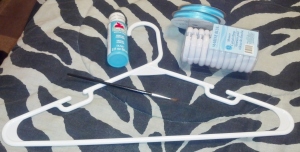
My supplies.

Nesting Project #3: DONE! I am really proud of myself for being on this roll of completing all the projects that I planned to make during my last weeks of pregnancy. I usually make a list of things to do and somehow always end up with things unchecked that remain unchecked for a looooong time.

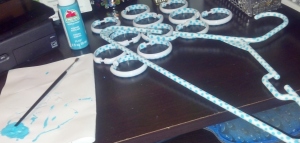
Painting the dots using the opposite end of the paint brush for perfect circle results.

Painting the dots using the opposite end of the paint brush for perfect circle results.

2013-03-04_20-26-33_662

Letting the dots on the rings dry by hanging them so I don’t mess them up.

But lately I have been feeling little bursts of energy, feeling the need to occupy my boredom with fun, easy crafts. This is the third craft I’ve done in less than a week and it is so cute! I was inspired by Pinterest. I saw a few pictures of similar organizers but a specific one caught my eye due to its creative decor. I decided I wanted to make one that looked JUST like it, but a different color. I used a plain white hanger that I already had (otherwise you can buy a pack for a $1 @ the Dollar Tree), shower curtain rings ($1 @ Dollar Tree), Turquoise paint ($0.50 @ Walmart), & 2 rolls of sheer turquoise ribbon ($2 ea. @ Walmart). This inexpensive and useful craft took me about 2 hours to make including drying time. I think it turned out so good! I don’t even want to hang it in my closet because I want it to be out in the open where it can be seen by everybody! I’ve been using a lot of pink lately because that’s my favorite color, BUT that’s not my only favorite color. I also love turquoise and lime green. When I first moved in my house I bought turquoise paint to paint my walls. I haven’t painted them yet, but I plan to! So I made this project to match what the color of my bedroom will be. (:

The Finished Project. (:

The Finished Project. (:


DIY Baby Door Muff

3 Mar

2013-03-03_16-07-25_549 2013-03-03_16-15-26_142 2013-03-03_17-02-27_61Nesting Project #2 Completed: My adorable handmade nursery door muff that I made for my baby girls bedroom. It was an idea inspired by Pinterest, but I’m sure you could’ve guessed that! It is similar to the photo I pinned to my nursery idea board, but I used different felt that would match the theme of Natalia’s bedroom. Everything in her room is pink and zebra, with some polka dot accents, so I had to make this project match. (:

The entire craft cost me a total of $3: $1 for the zebra print felt, & $2 for 2 yards of light pink satin ribbon all bought at Walmart. My Grandmother who is deceased spent her entire life being a seamstress, so my mother also sews and now I do too! I don’t know how to use a sewing machine yet, but I plan to learn. It probably would have cut the time in half but because it was such a small project, it didn’t take me more than 40 minutes to complete.

What you need:

  • 1 sheet of felt (print/color of your choice)
  • 2 yards of ribbon (also of your choice)
  • Fabric Scissors
  • Sewing needle
  • Thread (preferably the same color as the felt or ribbon, I used light pink)
  • Cotton pads (square would obviously be best, but I had round ones so I just cut them to size)

Directions:

  1. Cut the felt into two of the same sized pieces. They can be as small or as large as you like. Make sure it will fit around the door from knob to knob.
  2. Starting at one end, insert about a 1/2″ of one yard of ribbon in between the two pieces of felt and start sewing, making sure you keep the ribbon straight.
  3. Continue sewing all the way around until you get to the other side, then repeat step 2.
  4. Once you get around that corner, Insert your cotton pad (make sure it fits! If it doesn’t just cut it to size. I used two pads because one wasn’t long enough, which you can also do.)
  5. After the pad(s) are in place, continue to sew all the way around until you run out of thread.
  6. When finished sewing, just cut the thread and tie it into 2 or 3 knots and cut off the excess. You should not be able to see too much of the threading.
  7. Finally you are finished and you can just tie it to your baby’s room door knobs.

My whole reason for crafting this was 1.) to cure my state of boredom, 2.) it was on my list of nesting projects to complete, and 3.) I thought it was a very creative, practical and useful idea to make this for the baby’s room so that it would not make any noise when I closed the door, this way it would not wake the baby.

2013-03-03_17-08-02_429 2013-03-03_17-08-16_628

Nesting Projects

26 Feb

Well, since I need to start relaxing for my last 3 weeks of pregnancy, I figured I would get on Pinterest and find some inspiring ideas to occupy my time. I found quite a few amazing project ideas that I’m going to work on for the next couple of weeks while I wait on the rest of Natalia’s nursery decorations to come in the mail before I finish her bedroom!

Untitled#1. Cord Labels – I definitely need to organize my cables because I have so many that I have NO IDEA which is which! So this will be an easy organization project that will save me a lot of time and frustration. I have plenty of bread bag clips that I’ve been collecting since I pinned this, so I have enough to get started! I might decide to make mine extra cute and color them with a hot pink sharpie! ;D

875f9d00c4b6419ebbf095c8a3d8557c

#2. Toiletry Travel Case – Since I went to Gainesville over the weekend and me and my baby’s father are hours apart, this is the perfect travel case for me to make so I can bring it with me! I can foresee myself traveling a lot in the mere future, so this is definitely a must have for me. I already have cute colorful towels, sewing supplies and ribbon, so there’s no additional shopping I need to do to make this project. (:

c5a5bbef08d872cb7176f1c2e8fc2092

#3. Scarf Organizer – I absolutely LOVE this idea. I’ve seen quite a few of these on Pinterest, but this one is by far the cutest one I’ve seen. I want to make one JUST like but in Pink or Turquoise! I can get the shower rings at the Dollar Tree and the pretty ribbon at Walmart. I already have bright colored paint to paint polka dots and the white hanger. So this will be an easy project to organize my scarves. Then once I hang them I will have an extra drawer of space in my closet to add other stuff, like all the additional craft supplies that I have!

d384d4e0c6db893128163e3afc2565d6

#4. Duct Taped Clipboard – This is a simple 5 minute project that I want to make. I just need a clipboard! (Dollar Tree) I have the duct tape, But I also want to add a pretty pink ribbon at the top just to give it my personal girly touch! Then I can hang it on my wall so it will be an easy grab and go kind of thing and also add decoration to my plain walls. ❤
e2127639130288f1cb35a253518d5d25

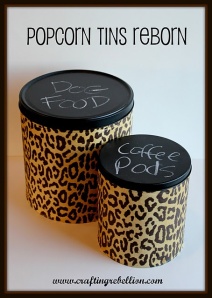
#5. Decorative Storage Tins – Another cute idea I came across that will be easy to make! I like the cheetah print and the black, but I might change it up. I’m not too sure exactly what colors or patterns I want to use, nor what to use them for, but I will figure it out once I start making them. So far, I’m thinking of decorating them with the theme of Natalia’s room and putting them in there for storage and decoration. I could put all my baby-related samples in them, or coupons, maybe even hair bows (although I would rather hang them on the wall). The idea will come to me! I don’t have popcorn tins, but I do have empty coffee tins that I could use.
f1a8c96c97689e79e62e2d4f2717d9f7

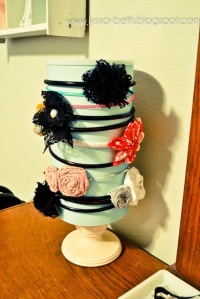
#6. Oatmeal Can Headband Holder – This idea is very similar to the one prior. I kind of like this one a little better, so I might just blend the two ideas together! I like the fact that you can wrap headbands around this and still be able to open it up to throw in the clips, hair ties and other hair accessories.
40c273a0fc6908998762e6bcdaad37d6

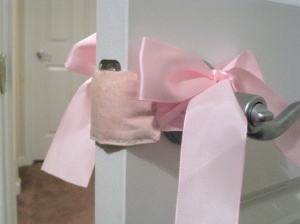
#7. Baby Room Door Muff – Awesome idea! I love how cute and purposeful this is. It’s also very easy to make and I have all the materials needed to make it, so this is definitely on the project list!

387516368afa0c81563834ed12ff2440

#8. Convenient Bib Hanger – This is so perfect and what a great place for them to be! Very convenient baby bib organization. All I need is a large stick-on hanger that I can get very cheap pretty much anywhere. *Added to the grocery list. (;

52b88bcdf6495ad4a6a5d7357eb0df7e

#9. Maternity Photo Idea – I plan to take some professional maternity photos with my baby’s father’s uncle for free and this would be the perfect idea for it. Especially if it is an all black and white photo with the color splash ribbon. This is more of an idea/plan than a project, but it’s definitely on the to-do list!

28655380c7e6bdd784d7ee978d25ce6d

#10. Healthy Carbonated Beverage – Last but not least an easy delicious beverage recipe to satisfy my sweet tooth and still get the nutrients I need. This delicious blended fruit soda blend will be on my list of drinks to try before I have this baby. (:

So these are my top ten nesting ideas & projects that I want to do while I wait for Natalia’s arrival. I will start my shopping tomorrow afternoon and my next post will look exactly like this one, except they will consist of all MY personal project photos. ♥

Brazilian Dessert <3

25 Feb

2013-02-25_20-50-20_478

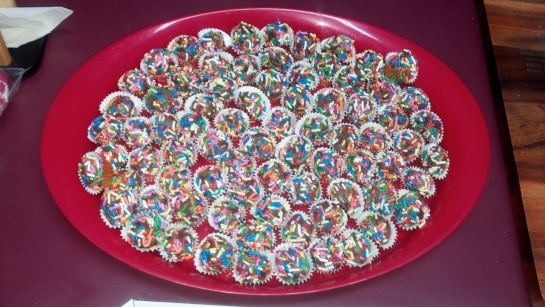
This is my mom’s famous Brazilian Brigadeiro’s Recipe. It has been a traditional dessert custom from my mom’s side of the family in Rio de Janeiro, Brazil. They are TOO DIE FOR. It only takes 4 simple ingredients and about an hour and a half to make. They are fattening but worth every calorie, I promise. (;

2013-02-25_18-27-05_899 2013-02-25_18-33-21_315 2013-02-25_18-47-23_630 2013-02-25_20-34-43_715Ingredients:

  • 2 cans sweetened condensed milk
  • 1 stick butter (1/2 stick per can)
  • 4 tbsp cocoa powder (or chocolate syrup)
  • Lots of sprinkles!
  • Candy/small cupcake wrappers

NOTE: This makes approximately 100 candies depending on the size you make them.

Directions:

  1. In a medium saucepan, combine butter, condensed milk and cocoa poweder or syrup. Cook over medium heat for about 20-25 minutes, turning the heat down to medium-low heat after about ten minutes or whenever the sauce starts to bubble vigorously.
  2. Stir consistently, the entire time, no breaks! To make sure you evenly cook the sauce mixture until it becomes a very thick paste. I suggest using a ceramic pot because then the mixture wont stick. But if you don’t have a ceramic pot, a regular one works just fine.
  3. After the sauce becomes a thick paste, remove from heat and let cool down for about 30-45 minutes. DO NOT cool in refrigerator. Let it cool down naturally.
  4. Now this step will take two people, one to make the balls and one to add the sprinkles. But this is totally capable of being a one man job. Just follow directions carefully! Separate all the candy wrappers and have them ready to insert the candies once they are sprinkled. You can set them on a large platter or plate, whatever you have that works.
  5. In a very large shallow bowl, pour all the sprinkles in it. Cover your hands with softened butter so you will be able to roll the mixture into balls. You can use and kind of greaser but butter works the best because its what you used to cook the candies with, so it wont change the flavor.
  6. After you butter your hands, use a small spoon to get a good amount of the dulce de leche mixture (that will fit in the candy wrapper) and roll it into a ball, then place it in the bowl of sprinkles. If you are doing this by yourself, do not start messing with the sprinkles until you have placed all of the candies in there, otherwise you will just make a big huge mess!
  7. Once you’ve finished rolling all the candies, cover them entirely with the sprinkles and place them in their designated wrapper. Then you’re done! I suggest putting them in the refrigerator for about 20-30 minutes to make them a little hard because they taste better in my opinion. Or if you just can’t wait then go ahead and eat them because they taste good regardless! (:

Inspired Quote Art

20 Feb

Since I graduated and it was such a huge accomplishment for me, the event inspired me to draw; which I haven’t done in quite a while! I have been spending all my time setting everything up for my baby girl, so I didn’t do any kind of big, fancy art, just something small and simple that meant a lot. I am going to add this to my quote collage that I plan to make sometime in the future after Natalia is born, while I will be at home taking care of her and having some free time. (:

IMG_20130218_184830

The F. Nails

Nails for the stylish youth

arosebrown

Fashion. Beauty. Photography. Art. Advertising. Design.

Nail Luxxe

Nails, Nail Art Designs, Nail Care & More

Beauty by Brittany

Everything and Anything Beauty!

dottyaboutnails

One girl, ten nails and a million nail polishes....

Polish Alcoholic

I confess... I'm addicted to nailpolish

Doula Momma

Discussing pregnancy, birth, cesarean, VBAC, breastfeeding, babies and more

CosmeticsObsession

Your one stop blog for everything makeup.