Tag Archives: decorate

Next 15 Pinterest Projects To Do

26 Mar

Hello my beautiful readers! As I’ve mentioned in one of my previous posts, I just recently finished completing a list of 10-12 nesting projects that I was inspired to make from Pinterest, and I’m sure you guys are expecting my next list that I talked about making. Well, I’m done choosing which projects to do next while I wait for little Natalia to be here (which btw I’m 41 weeks and 1 day today and she’s still not here!) So to keep my head on straight, I’m going to occupy myself with these cute projects that I found to keep myself busy. (:

#1. Glitter Wine Glasses

155303887120076180_F3gIlXA5_c

After I have this baby, I’m definitely planning on celebrating my treating myself to a very long missed glass of wine, but I want it to be festive and decorative so I’m going to make a pink glitter wine glass for my 9 month break celebration. These are so easy to make, all I need to do is get some very fine loose pink glitter and a couple of cheap wine glasses from the dollar store.

#2. DIY Nail Polish Rack.

ec802992a52689fed2123cf15860e096 dsc05671

If you follow my blog, then you are familiar with my addiction for nail polish and nail art. I have quite a large collection of nail polish and nail art supplies, but they’re all stored away in shoe boxes. I was going to decorate the shoe boxes but it just seems like to much trouble, especially since they’re not even visible, they’re sitting on shelves in my closet. I planned to buy a nail polish display rack that mounts on the wall from Amazon, but it’s $30! I came across this AMAZING idea where you make your own nail polish rack using foam boards, glue and whatever you want to decorate it with. I find so many pros to this project that completely knock this item off my Amazon wish list. For one, it’s totally affordable. Considering I have all the decorations I need, I only have to spend $12 making this ($7 for 3 foam boards – 1.99 each plus tax @ Walmart, and $4 plus tax for some permanent craft glue.) Aside from the inexpensiveness of this project, one of my other favorite things about it is that you can make it as big or small as you want, add as many shelves as you want, and decorate it to match whatever you want! Instead of using duct tape like many other people used, I’m going to mod podge glitter on mine and use duct tape for the inside background to hide that screws that I will have to insert to mount it on the wall. I also plan to add a larger top shelf to hold all my nail art supplies; which brings me to the next project shown, the decorative tin cans that will hold all my brushes. When I’m done with this project it’s going to look so cute in my room and help me to keep all my nail polish stuff organized. Not to mention the easy access of it being conveniently hung on my wall so I don’t have to take down boxes from shelves!

#3. Modular Shelf Organization.

a1898bd862386d232fc2a3514638820d

This is another item that I have saved to my Amazon wish list. My obsession goes on to make-up which I have TONS of and am looking for new ways to organize it. I’m going to start by moving all my hair care products to modular shelves that I will hang next to my mirror on my dresser, moving them off my dresser so that I have more room to store the new makeup that I keep buying but don’t need.

#4. Glitter Keys

glueglitterclearnailpolish

I LOVE glitter (if you can’t tell) and am trying to use all of mine in the most useful ways. I want to make my ugly keys cute and girly and what better way to do that then to add glitter?! So I’m going to mod podge glitter to all my undecorated plain silver keys to make them look as cute as this one. I want to do them all in pink, but different shades to give them a gradient effect.

#5. DIY Sunglasses Holder

86c78c4179461466caf85a1fd1964386

I have soooooo many pairs of sunglasses put away in a bag that I have to go through every time I want to wear a different pair. It’s a little aggravating to have to dump the entire bag out just so I can see what the pairs look like. Not only that but they are also at risk of being damaged. So I came across this nifty idea that I want to make that also hangs on the wall. (I’m trying to decorate my plain walls!) All I need is a long skinny picture frame and some pretty ribbon (zebra of course!) to make this, so I plan on buying these items sometime this week when I get paid. (:

#6. Glitter Clothespin Magnets

2dfd40d86e0d698477ed4220f1f8cdfb gflitterclothespinmagnets

More glitter? Yes please! I found these ADORABLE clothespin magnets that you can decorate however you want. I like the way whoever did this decorated theirs. They used glitter and zebra print, which is what I plan to do, but I’m going to make mine turquoise, hot pink & lime green. I already have clothespins, magnets and zebra fabric and duct tape, whichever I decide to use. I just have to buy neon acrylic paint that I can get at Walmart for $1.50 a bottle and some new paintbrushes because I’ve been using the heck out of mine! So I’m due for a new set. (: These will go perfect on the DIY magnetic board that I also plan on making, but I will post about that later on.

#7. Shower Curtain Rod Organization

showerrodoppositeformorestorage

Since my shower caddy keeps falling off, and it’s hard to clean, and it’s pretty much breaking my shower head off, I found this useful idea to hang another shower curtain rod on the opposite side of the shower and use curtain hooks to hang dollar store baskets and other items. I’m definitely going to make use of this. I already have the shower curtain rod, but I can get the hooks for $1 at Dollar Tree and the cute baskets (orange to match my bathroom) at Familiar Dollar. I think I can get a pack of 6 for $3.

#8. Bobby Pin Carrier

 820b81e68d55e11a14ab3960f6a2e88a

This simple idea is so useful for a girl like me. I use bobby pins ALL THE TIME and need them at the most random times. What better way to carry them than with a tic tac box?! I can use it for traveling and to just have in my purse. All I need to buy are the tic tacs. (:

#9: Easy To Make Bookmarks

d980cd466331df42af9766f7b87b7903 whenyouloseanearring

I’ve never been much of a reader, until lately. And I don’t have any cute bookmarks, but I do have a lot of cute missing or broken jewelry pieces, and tonsssss of scrap-booking paper and supplies as well as ribbon. So I figured I could put these items to use and make my own bookmarks like these cute ones!

#10. Easy To Make Hair Bows

7d2150a33d65c9466bee45d7b74c19b9

I loveee hair accessories: hair bows, headbands, ribbons, clips, flowers, anything to accentuate your everyday hairstyles. So I want to try to make my own just for the heck of it! I found this cute easy tutorial that I want to try out.

#11. Mod Podge Ceiling Fan

76a2987f58948d3712d43bf5b8b78f6a

I have an $80 zebra print fan blade set saved to my “future” Amazon wish list. But that just got deleted the other day when I came across this picture! Somebody used wallpaper border and applied it to their ceiling fan blades that made it look so good I had to do the same! But instead of using wallpaper border (because it’s pretty expensive) I’m going to use fabric mod podge and just apply zebra print fabric to it! I want to do this for my fan and the Natalia’s fan to match her and my zebra print bedrooms. ❤ *BTW the last of these projects including this one are all baby related projects.

#12. Glitter Rocks for Decoration

e8de5332f199f98d2a980b3e5c9b20b8

Yes, I have more glitter projects on the list. A girly girl like me can never have too much sparkle in her life. I think this is the cutest idea ever. Since I live in the country surrounded by woods and nature, these rocks are easy to find around here and match the environment so well, and adding sparkle will just give it that girly personalization that I love to add to everything of mine. But this project however is for my daughters bed room. I don’t have too many things decorating the tops of her dressers and night table, so this is an expensive decoration that I will make for her instead! I just need the rocks, the glue, the glitter and a cute little acrylic container to put them in, which I can get one at the Dollar Tree for just a dollar.

#13. Make a Plain Plastic Basket Cute with Ribbon

2809456d19e9f4640b691be445d1dfd8

Natalia has some baskets in her room that I bought to hold stuff in and they looks similar to this basket but they’re actually cuter because I bought pink ones, hehehe. (; I also have very pretty sparkly silver, black and white ribbon I can use to decorate them with even more because Lord knows how much I love ribbon and how many ribbon bows I already have all over Natalia’s room. She’s going to be such a girly girl just like her momma. ❤

#14. 3D Butterfly Frame

359c4f03ed6849681724982b9d30786c

I think this is just absolutely adorable. All white butterflies and one pink one with the baby’s name date and time of birth. I want to make this for Natalia and hang it on the wall. I need to buy a black frame and a butterfly punch. I have the card stock. This will be so fun to make!

#15. Decorated Letter

8ed9911b504435d938a008ce1360540b 6a9f4b3ba48c6e0b3ec924f26e130b91 6dbd1acd4bee1003bfb97fb8ef58ebdc fabriconcanvaswithwoodletters 505ac2cc508e92751255eac2847351fc 27b47d433e7ecb1b6a5229627b0f37d8

I was going to buy letters to spell out NATALIA, but they are so expensive these days! You can buy cheap ones, but they’re just not as cute as the other ones. I have old letters that spell out KAREN because that’s my sisters name, but she never used them, so they’ve just been laying around collecting dust. I’m going to use just the N letter and decorate that to hang on the door since her room already has too many wall decorations. I have all these photos for ideas and inspiration. ❤

Baby Keepsake Box

4 Mar

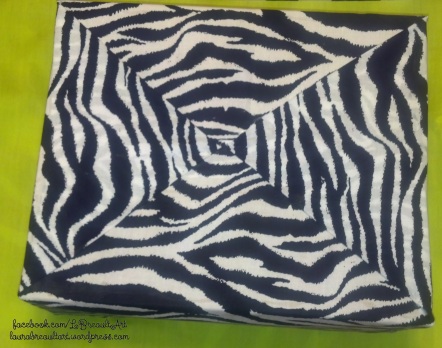
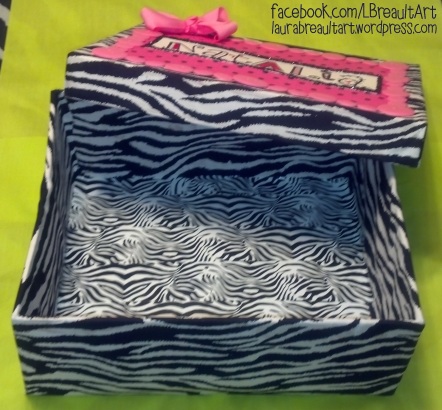
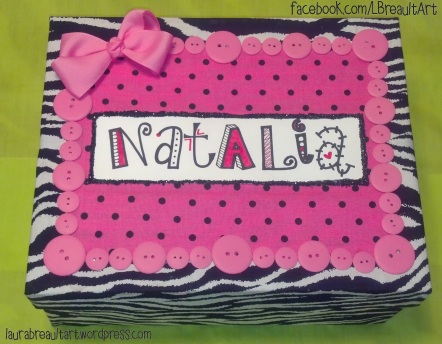
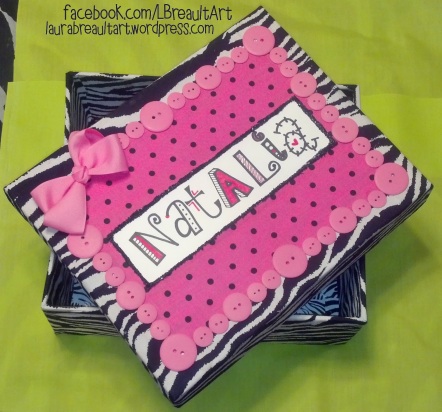
This is my newest baby project: Natalia’s baby box. I decided to make her a box that would contain all her keepsakes as memoirs. I wanted to decorate it to match her nursery which is all zebra print with light pink and dark pink polka dots. This is the completion of it & I think it turned out 10x times better than I imagined in my head! Even though I sketched it before hand. ;D

This is the second box that I’ve decorated and I did a wayyyyy better and faster job on this one than my first. It only took me 3 days to complete, but only because I had to wait to go to the store to get the rest of the supplies I needed. When I made my first box, I googled “how to decorate a box” and was disappointed not to see too many instructions on how to do that. So I am going to make my own instructions on box decorating!

  1. Brainstorm! The first step is to think about what you want to have a box for of course. It could be to store things in, to give as a gift, or simply just for a decoration project when you’re bored!
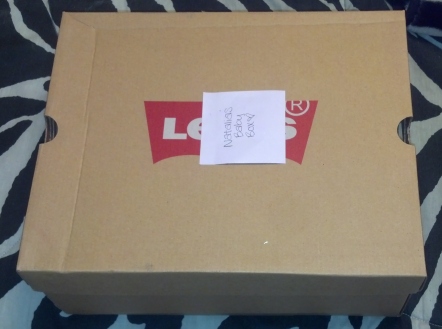
  2. Decide what size box you need/want, and go get it! I knew I needed a big box because I was going to store an entire baby book along with other bulky items such as her homecoming outfit and things of the like. I got my box for free at a shoe store because buying a big box would just be too expensive, and they are usually already decorated. What’s the fun in that?!2013-02-28_11-50-52_524
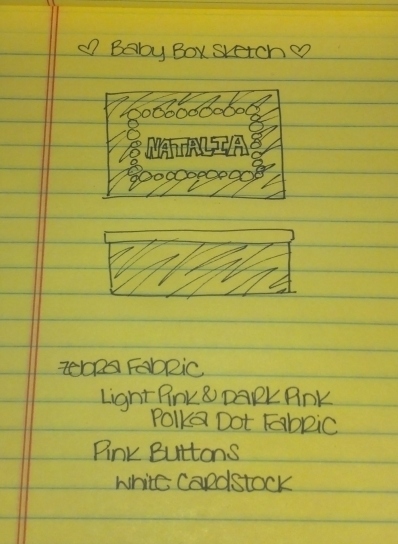
  3. Sketch a drawing of what you imagine your box to look like. I always think before hand to save time. I sketched how I wanted the box to look like, what kind of fabric I would use, the colors, the accessories, and the font for the lettering.2013-02-25_18-53-24_43
  4. Shop for supplies! This is my favorite part (;
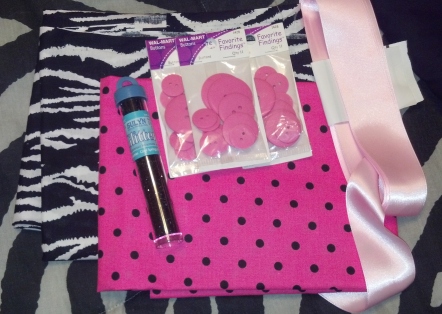
    Buy everything you will need to make your box. I went to Walmart and bought zebra and polka dot fabric ($8), 3 packs of assorted pink buttons ($6; $2 ea.), a pretty pink bow clip in the children’s section ($1), and then went to Save A Lot for fabric glue ($2) because it’s just cheaper there. The other supplies, I already had, which include a sharpie, a pink marker, and card stock to draw the name, loose black glitter, Elmer’s glue, fabric scissors, and zebra duct tape ($3.50).2013-02-28_11-52-31_53
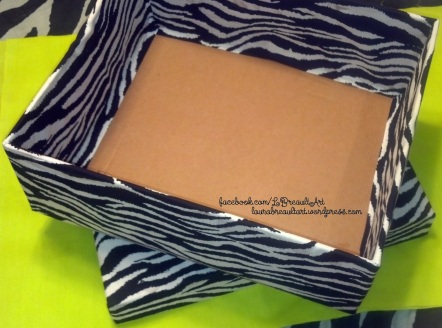
  5. Measure and cut fabric to size of the box. I bought such a large piece of zebra fabric that I didn’t have to do too much cutting and it turned out looking so much better than if I would have had to cut it to fit around the corners because it wrapped around perfectly (conveniently for me). I started by gluing one side at a time and letting it dry before I went on to gluing the next side, this way when I pulled the fabric around the corner, I wouldn’t move the fabric I just glued out of place. Make sure you glue the very outside edges of the inside and the outside of the sides of the box. Otherwise, if you just glue the insides, you will have to come back around and glue the outside, but it will be hard to lift the fabric because it will already be glued around the box.2013-03-03_22-41-56_973
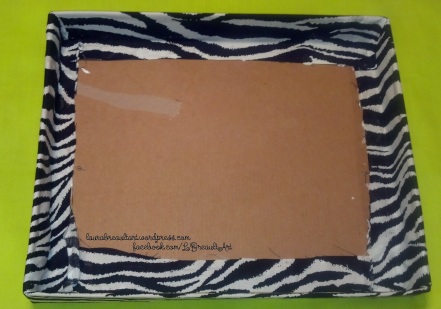
  6. To give the bottom of your box a neat finish, fold the fabric as if you were wrapping a preset box and glue the trim down and hold it in place until it’s somewhat dry (It will completely dry on its own, but this makes the fabric completely flat because the glue will seep through the fabric).2013-03-03_22-10-35_291
  7. You can use the same technique to fabric the lid, but the lid is easier because you can glue the edges of the top, place the fabric, let it dry, and then one by one glue each side down, folding the corners inwards to make it look neat.2013-03-03_22-41-29_272
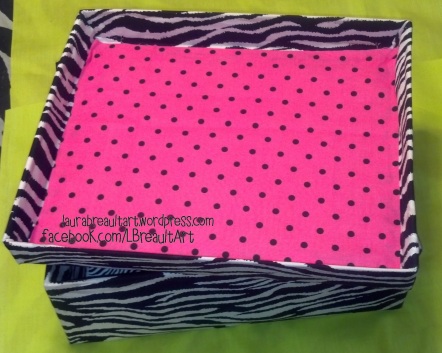
  8. Cover the bottom of the inside of your lid and box. I used the pink polka dot fabric to cover the inside of the lid, and zebra duct tape to cover the inside of the box. I used tape because it was easier to make stick, it would hold the bottom fabric in place and it looks good! I used the pink on the lid because I wanted it to be different. 😀2013-03-03_23-52-34_582013-03-03_23-52-11_657
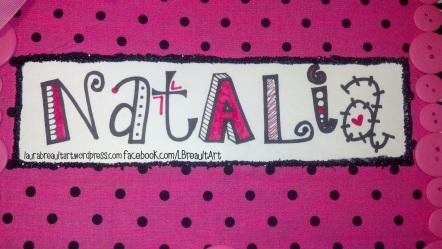
  9. Lastly, decorate it however you like! I cut a smaller sized square piece of the pink polka dot fabric and glued (just the edges) in the middle top of the box lid. I then drew Natalia’s name in cooky, child like font letters. I used the elmer’s glue to glue a trim on the outside of the card stock and sprinkled glitter all over it to give it a cute border. Then I glued the pink buttons on the border of the pink fabric, after I arranged them to make sure they would all fit. I glued the pink box in the corner and then her name in the middle. Finally finished! Although I still want to get some black sequin ribbon to glue on the inside of the lid to border the pink fabric under there, but for now it looks good, and the ribbon can wait until next time I go to the store.2013-03-03_23-49-39_132 2013-03-03_23-51-00_12

    2013-03-03_23-52-56_433

Nesting Projects

26 Feb

Well, since I need to start relaxing for my last 3 weeks of pregnancy, I figured I would get on Pinterest and find some inspiring ideas to occupy my time. I found quite a few amazing project ideas that I’m going to work on for the next couple of weeks while I wait on the rest of Natalia’s nursery decorations to come in the mail before I finish her bedroom!

Untitled#1. Cord Labels – I definitely need to organize my cables because I have so many that I have NO IDEA which is which! So this will be an easy organization project that will save me a lot of time and frustration. I have plenty of bread bag clips that I’ve been collecting since I pinned this, so I have enough to get started! I might decide to make mine extra cute and color them with a hot pink sharpie! ;D

875f9d00c4b6419ebbf095c8a3d8557c

#2. Toiletry Travel Case – Since I went to Gainesville over the weekend and me and my baby’s father are hours apart, this is the perfect travel case for me to make so I can bring it with me! I can foresee myself traveling a lot in the mere future, so this is definitely a must have for me. I already have cute colorful towels, sewing supplies and ribbon, so there’s no additional shopping I need to do to make this project. (:

c5a5bbef08d872cb7176f1c2e8fc2092

#3. Scarf Organizer – I absolutely LOVE this idea. I’ve seen quite a few of these on Pinterest, but this one is by far the cutest one I’ve seen. I want to make one JUST like but in Pink or Turquoise! I can get the shower rings at the Dollar Tree and the pretty ribbon at Walmart. I already have bright colored paint to paint polka dots and the white hanger. So this will be an easy project to organize my scarves. Then once I hang them I will have an extra drawer of space in my closet to add other stuff, like all the additional craft supplies that I have!

d384d4e0c6db893128163e3afc2565d6

#4. Duct Taped Clipboard – This is a simple 5 minute project that I want to make. I just need a clipboard! (Dollar Tree) I have the duct tape, But I also want to add a pretty pink ribbon at the top just to give it my personal girly touch! Then I can hang it on my wall so it will be an easy grab and go kind of thing and also add decoration to my plain walls. ❤

e2127639130288f1cb35a253518d5d25

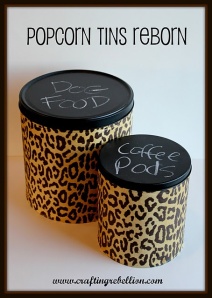
#5. Decorative Storage Tins – Another cute idea I came across that will be easy to make! I like the cheetah print and the black, but I might change it up. I’m not too sure exactly what colors or patterns I want to use, nor what to use them for, but I will figure it out once I start making them. So far, I’m thinking of decorating them with the theme of Natalia’s room and putting them in there for storage and decoration. I could put all my baby-related samples in them, or coupons, maybe even hair bows (although I would rather hang them on the wall). The idea will come to me! I don’t have popcorn tins, but I do have empty coffee tins that I could use.

f1a8c96c97689e79e62e2d4f2717d9f7

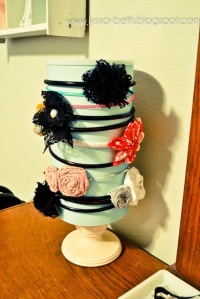
#6. Oatmeal Can Headband Holder – This idea is very similar to the one prior. I kind of like this one a little better, so I might just blend the two ideas together! I like the fact that you can wrap headbands around this and still be able to open it up to throw in the clips, hair ties and other hair accessories.

40c273a0fc6908998762e6bcdaad37d6

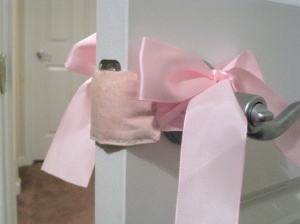
#7. Baby Room Door Muff – Awesome idea! I love how cute and purposeful this is. It’s also very easy to make and I have all the materials needed to make it, so this is definitely on the project list!

387516368afa0c81563834ed12ff2440

#8. Convenient Bib Hanger – This is so perfect and what a great place for them to be! Very convenient baby bib organization. All I need is a large stick-on hanger that I can get very cheap pretty much anywhere. *Added to the grocery list. (;

52b88bcdf6495ad4a6a5d7357eb0df7e

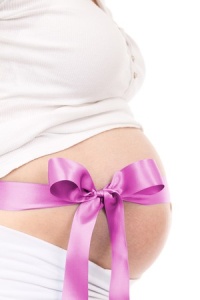
#9. Maternity Photo Idea – I plan to take some professional maternity photos with my baby’s father’s uncle for free and this would be the perfect idea for it. Especially if it is an all black and white photo with the color splash ribbon. This is more of an idea/plan than a project, but it’s definitely on the to-do list!

28655380c7e6bdd784d7ee978d25ce6d

#10. Healthy Carbonated Beverage – Last but not least an easy delicious beverage recipe to satisfy my sweet tooth and still get the nutrients I need. This delicious blended fruit soda blend will be on my list of drinks to try before I have this baby. (:

So these are my top ten nesting ideas & projects that I want to do while I wait for Natalia’s arrival. I will start my shopping tomorrow afternoon and my next post will look exactly like this one, except they will consist of all MY personal project photos. ♥

Holiday Celebration Toes

5 Jan

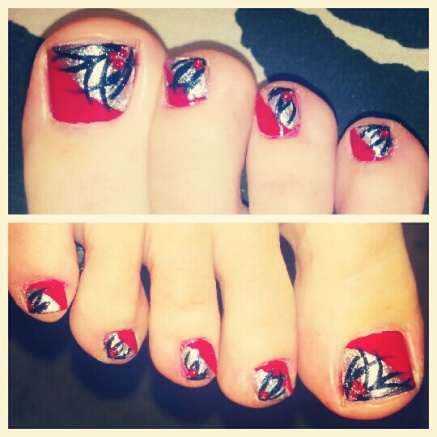
IMG_20121231_232711I call this week’s toe nail design: Holiday Celebration. I used red, black and silver colors to represent the holidays. I started by painting all my toes with Pure Ice bright red nail polish. I then used a sparkly silver nail polish that I got from RUE21 to paint a layer of silver diagonally across all my toes. Next I used my black nail art nail polish to draw several decorative stripes and swirls on the silver part of all my toes. After those dried, I adhered three red rhinestones on the silver corner of my big toe, and only one on the rest of them. Lastly, I finished them off with Sally Hansen’s clear top and base coat. Walla! My Holidays Toe nails for this week.

Casual Make-Up

3 Jan

IMG_20121225_195325 IMG_20121225_194843IMG_20121225_200258IMG_20121225_195416   IMG_20121225_200211

Here are a few photos showing my most often used casual style of make-up. I use brown a lot because it’s a simple, day time color that goes with any outfit. Although some days when I wear bright colored clothes, I usually like to match my eye make-up to the clothes I’m wearing. My birthday is coming up this month on the 27th (I’ll be 20 years young!) and I only want two things. The first thing I want is a huge multicolored eyeshadow palette with a bunch of bright colors. The second thing I want is a professional make-up artist brush kit. I already have the EXACT palette and brushes I want added to my Amazon account wish list. I can get both items for unbelievably less than $40.

71Url8ZFISL._SL1000_

32 Piece Set for $16.15 @ Amazon.com

91eCSnKDkoL._SL1500_

96 Color Palette by Shany Cosmetics for $15.11 @ Amazon.com

71vwpTTHH-L._SL1100_A couple days ago I finally found the decorative diamond rocks I was looking for. I bought the cutest blue, pink, & clear crystals for only $5.55 on Amazon, free shipping! I swear that’s like, the ONLY place I shop at because they have everything in the entire world for some good prices. Anyways, I wanted these decorations so bad because I want to put them in a pretty glass cup and use it to hold all my brushes. Not to mention, they are the same as the accent colors of my bedroom. It will be the perfect addition to my vanity. I can’t wait to re-organize and set up all my make-up.  Before you know it, my bedroom will look like a mini salon with everything from hair accessories, to nail polish displays, to shoes displayed on the wall, to the perfect cosmetic collection. I’m looking forward to the results and will be taking many pictures to show everyone. I feel like this is going to be my little practice for when I open my own salon in the future, hopefully after I’m retired.

Here is where I ordered the blue pink and clear crystals.
Here is where I’m going to order the make-up palette and the brushes.

The F. Nails

Nails for the stylish youth

arosebrown

Fashion. Beauty. Photography. Art. Advertising. Design.

Nail Luxxe

Nails, Nail Art Designs, Nail Care & More

Beauty by Brittany

Everything and Anything Beauty!

dottyaboutnails

One girl, ten nails and a million nail polishes....

Polish Alcoholic

I confess... I'm addicted to nailpolish

Doula Momma

Discussing pregnancy, birth, cesarean, VBAC, breastfeeding, babies and more

CosmeticsObsession

Your one stop blog for everything makeup.